Exporting Makefiles
If you created a Managed Make C Project, you can use Eclipse* to build
a makefile that includes Intel compiler options. See Setting
Properties. When your project is complete, you can export your makefile
and project source files to another directory, then build your project
from the command line using make.
Exporting makefiles
To export your makefile:
- Select your project in the Eclipse C/C++
Projects view.
- From the Eclipse File
menu, select Export to launch
the Export Wizard.
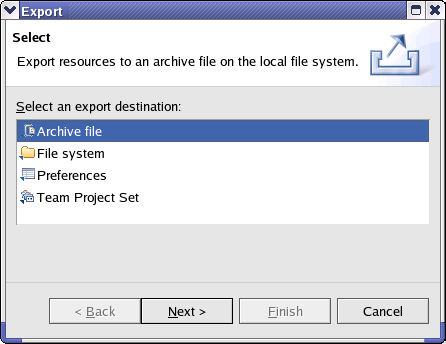
- On the Select
dialog of the Export Wizard, select File
system, then click Next.
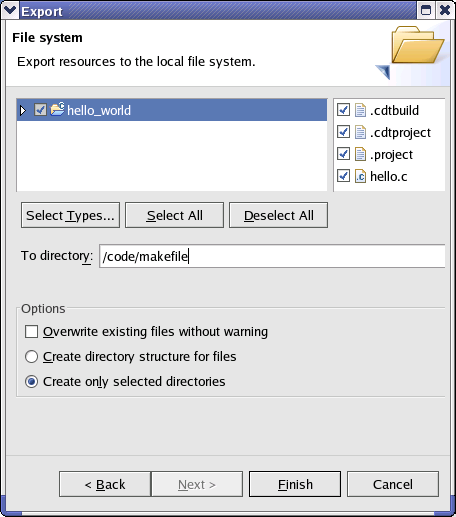
- On the File system
dialog, check both the helloworld
and Release directories in the
left-hand pane. Be sure all the project sources in the right-hand pane
are also checked.
 Note
Note
You may deselect some files in the right-hand pane, such as the hello.o object file and helloworld
executable. However, you must also select Create
directory structure for files in the Options
section to successfully create the export directory. This also applies
to project files in the helloworld directory.
- Use the Browse
button to target the export to an existing directory. Eclipse can also
create a new directory for full paths entered in the To
directory text box. If, for example, you specified /code/makefile
as the export directory, Eclipse creates two new sub-directories:
- /code/makefile/helloworld
- /code/makefile/helloworld/Release
- Click Finish
to complete the export.
Running make
In a terminal window, change to the /cpp/hello_world/Release
directory, then run make by typing:
make clean all
You should see the following output:
rm -rf ./hello.o
./hello.d
hello_world
Building file: ../hello.c
Invoking: C Compiler
icc -c -o hello.o ../hello.c
Finished building: ../hello.c
Building target: hello_world
Invoking: Linker
icc -ohello_world ./hello.o
Finished building target: hello_world
This generates the hello_world executable in
the same directory.